Installation and Setup
Contents
Installation and Setup
This guide provides step-by-step instructions for installing the Singularity container build of the Cerebras Software Development Kit (SDK).
This is the way to use the SDK if you’re running the fabric simulator locally on your own machine, or you’re using a legacy Cerebras system installation.
For information about using the SDK on Cerebras Wafer-Scale Clusters running in appliance mode, see Running SDK on a Wafer-Scale Cluster.
Getting Access
The Cerebras SDK Singularity container is available upon request at this link.
A repository of example programs can be found on GitHub.
Summary
The files you downloaded from Cerebras will contain the SDK software consisting of several scripts, folders, and other files such as the EULA.
The SDK software is composed of a Singularity Image File named sdk-cbcore-{build id}.sif.
There are helper scripts to access the relevant functionality of the SIF: cslc, cs_python,
csdb, cs_readelf, and sdk_debug_shell.
Requirements
Apptainer or SingularityCE: Apptainer, SingularityCE or another container platform capable of running Singularity containers is required for hosting the Cerebras SDK container image. See the Apptainer Quick Start or SingularityCE Quick Start guide for instructions on how to set up Singularity.
Overlay Filesystem: The SDK requires that the overlay filesystem functionality is available on your Linux system. If your Linux kernel version is 3.18 or later then the overlay filesystem functionality is already available.
Bash: The SDK requires Bash on your Linux system.
Make sure your system has the required software before proceeding to the installation.
(Optional) Hash check with sha256sum
After downloading the files on Dropbox, you should have the following files in the same directory:
Cerebras-SDK-2.10.0-{build_id}.tar.gz: The tarball containing the Singularity container.
sha256sum.txt: A text file containing the hash of all the tarball.
Verify that the downloaded files are not corrupted. Follow these steps:
In the directory where you have downloaded the tar file, verify the checksum:
$ cd /my/install/location
$ sha256sum --check sha256sum.txt
If you see the output that shows OK, then the downloaded files are not corrupted and are good to use.
Extract the files
To extract the SDK contents, first set the following environment variables.
The
SDK_INSTALL_LOCATIONis the location you want to install the Cerebras SDK. This can be any (writable) directory.SDK_INSTALL_LOCATIONandSDK_TAR_PATHshould be absolute paths.$ SDK_INSTALL_LOCATION=/my/install/location $ SDK_INSTALL_PATH=$SDK_INSTALL_LOCATION/cs_sdk $ SDK_TAR_PATH=/path/to/Cerebras-SDK-2.10.0-{build id}.tar.gz
Create the directory where you will install the Cerebras SDK, and extract the files from the downloaded tar file into that directory.
$ mkdir -p $SDK_INSTALL_PATH
$ tar -C $SDK_INSTALL_PATH -xvf $SDK_TAR_PATH
Extracted files
Verify that the following files are present in the $SDK_INSTALL_PATH directory:
sdk-cbcore-{build id}.sif: This is the SDK software. This file is about 3GB.
cerebras-software-eula.pdf: This is the End User License Agreement.
csdb: This is a script for running hardware debug tools.
cslc: This is a script for running the CSL compiler.
cs_python: This is a script for running Python code using the version of Python provided in the.sif.
cs_readelf: This is a script for running a Cerebras alternative toreadelf.
sdk_debug_shell: This is a script for running simulation debug tools, including the smoke test and the SDK GUI.
sdk-gui-LICENSE.txt: This is the license for the GUI tool included.
csl-extras-{build id}.tar.gz: This is a tarball containing example programs and additional extras.
examples/: This is a folder containing SDK example programs, including tutorials.
syntax_highlight/: This is a folder containing a CSL syntax highlighter for vi/vim and VS Code IDE.
Installing the SDK software
Continue with the below steps to install the SDK software.
Add the Cerebras SDK to your PATH.
$ PATH_CMD='export PATH='$SDK_INSTALL_PATH':$PATH'
$ eval $PATH_CMD
Add PATH update command to .bashrc:
$ echo $PATH_CMD >> ~/.bashrc
Test
Make sure you are in the install directory by running the below command:
$ cd $SDK_INSTALL_PATH
Untar the examples if you have not done so already, and run a basic smoke test to verify that the included examples compile and run as expected:
$ tar -xzvf csl-extras-{build id}.tar.gz
$ sdk_debug_shell smoke csl-extras-{build id}
You can optionally set the environment variable SINGULARITYENV_CSL_SUPPRESS_SIMFAB_TRACE=1
when running the smoke test to prevent the generation of simfab_traces for use with the
SDK GUI.
This will greatly decrease wall clock time and disk space used by the smoke test.
Note that you will need to unset this environment variable before
running examples for use with the SDK GUI.
This smoke test will run all example programs in the simulator. If successful, your final output should be as below:
SUCCESS!
PASSED
SMOKE CHECK COMPLETED SUCCESSFULLY
A successful smoke test indicates that the package is installed and setup correctly.
(Optional) Test for verifying SDK Debug GUI tool using the
gemm-collectives_2dexample:Run the
gemm-collectives_2dtest:$ cd $SDK_INSTALL_PATH/csl-extras-{build id}/csl_examples/benchmarks/gemm_collectives_2d $ ./commands.sh
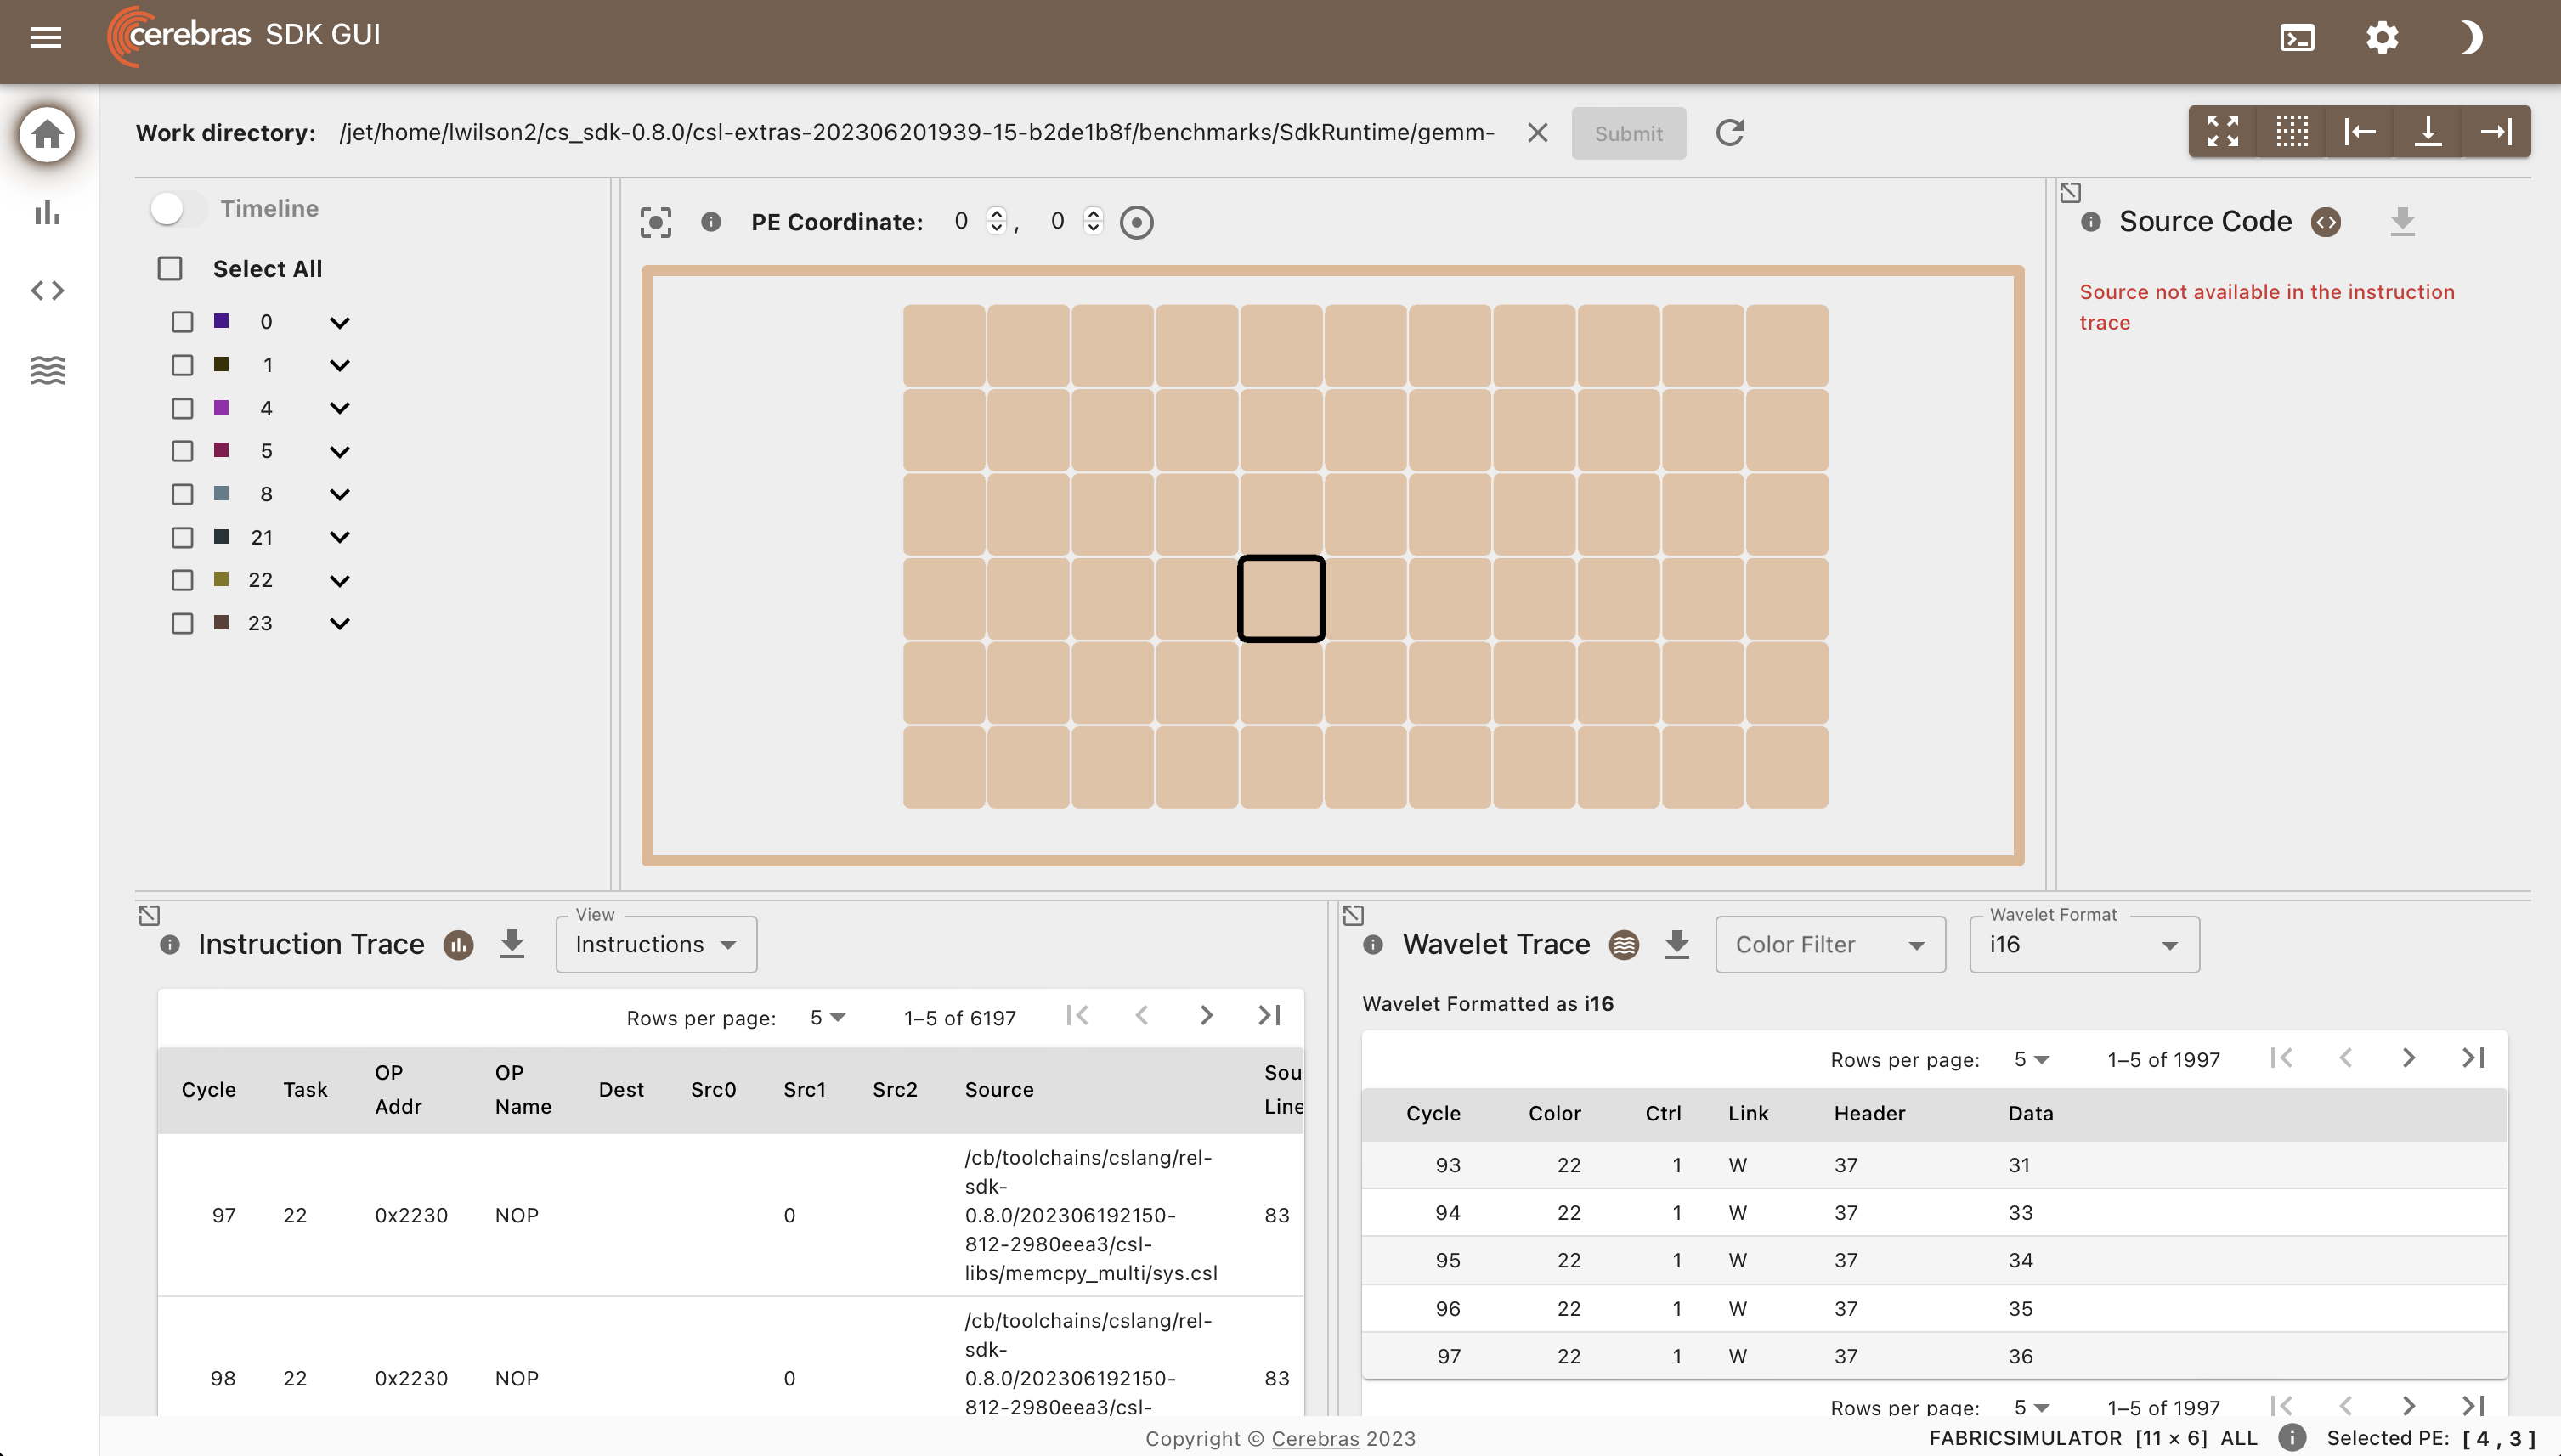
Run the SDK Debug GUI:
$ sdk_debug_shell visualize
This will provide a URL.
Navigate to this URL in your browser:
Click this link to open URL:  http://<url>:8000/sdk-gui?session_id=...
Click this link to open URL:  http://<ip address>:<port>/sdk-gui?session_id=...
Press Ctrl-C to exit
If you navigate to either URL, you will see the following after selecting a PE:
Apple Silicon Mac Installation
The recommended method for running the Cerebras SDK on an Apple Silicon Mac is via a Lima Linux virtual machine. The documentation for Lima can be found here.
Either Rosetta or QEMU can be used to run the SDK. If available, Rosetta is recommended for much better performance.
Rosetta-based installation
Warning
Tested with Lima >= 2.0.0 and macOS >= 26.2. Check lima documentation for more details.
First, install Lima via brew:
$ brew install lima
Next, create a Lima aarch64 virtual machine with Singularity or Apptainer installed.
This ARM virtual machine will be used to start a x86_64 container containing the SDK.
The following config.yml is provided as an example,
with your Mac’s home directory and /tmp/lima mounted as writeable directories:
minimumLimaVersion: 2.0.0

containerd:
  system: false
  user: false
provision:
- mode: system
  script: |
    #!/bin/bash
    set -eux -o pipefail
    command -v apptainer >/dev/null 2>&1 && exit 0
    # Workaround for https://github.com/apptainer/apptainer/issues/2027
    echo "kernel.apparmor_restrict_unprivileged_userns = 0" >/etc/sysctl.d/99-userns.conf
    sysctl --system
    # add the "Official PPA for Apptainer"
    add-apt-repository -y ppa:apptainer/ppa
    apt-get update
    apt-get install -y apptainer
probes:
- script: |
    #!/bin/bash
    set -eux -o pipefail
    if ! timeout 30s bash -c "until command -v apptainer >/dev/null 2>&1; do sleep 3; done"; then
      echo >&2 "apptainer is not installed yet"
      exit 1
    fi
  hint: See "/var/log/cloud-init-output.log" in the guest

images:
# Try to use release-yyyyMMdd image if available. Note that release-yyyyMMdd will be removed after several months.
- location: "https://cloud-images.ubuntu.com/releases/noble/release-20251213/ubuntu-24.04-server-cloudimg-arm64.img"
  arch: "aarch64"
  digest: "sha256:a40713938d74aaec811f74cb1fa8bfcb535d22e26b2a0ca1cc90ad9db898feb9"
- location: https://cloud-images.ubuntu.com/releases/noble/release/ubuntu-24.04-server-cloudimg-arm64.img
  arch: aarch64

mounts:
- location: "~"
  writable: true
- location: "/tmp/lima"
  writable: true

mountType: "virtiofs"

vmOpts:
  vz:
    rosetta:
      enabled: true
      binfmt: true
QEMU-based installation
Warning
With x86 emulation, performance will be sluggish, and emulation bugs are possible.
First, install Lima and the QEMU emulator via brew:
$ brew install lima qemu
Next, create a Lima x86 virtual machine with Singularity or Apptainer installed.
The following config.yml is provided as an example,
with your Mac’s home directory and /tmp/lima mounted as writeable directories:
vmType: "qemu"

images:
- location: "https://cloud-images.ubuntu.com/releases/22.04/release-20231130/ubuntu-22.04-server-cloudimg-amd64.img"
  arch: "x86_64"
  digest: "sha256:7edc2eccf1e34df23d9561b721b6fed381c3b6e8c916c91c71bbce7b8488b496"

arch: "x86_64"

# max/base mean the maximum/minimum features supported by the host system
cpuType:
  x86_64: "max"

ssh:
  loadDotSSHPubKeys: false

mounts:
- location: "~"
  writable: true
- location: "/tmp/lima"
  writable: true

containerd:
  system: false
  user: false


provision:
- mode: system
  script: |
    #!/bin/bash
    set -eux -o pipefail
    export DEBIAN_FRONTEND=noninteractive
    apt-get update -y && apt install -y squashfs-tools-ng
    wget https://github.com/sylabs/singularity/releases/download/v4.0.2/singularity-ce_4.0.2-jammy_amd64.deb
    apt install -y ./singularity-ce_4.0.2-jammy_amd64.deb

probes:
- script: |
    #!/bin/bash
    set -eux -o pipefail
    if ! timeout 30s bash -c "until command -v singularity >/dev/null 2>&1; do sleep 3; done"; then
      echo >&2 "singularity is not installed yet"
      exit 1
    fi
  hint: See "/var/log/cloud-init-output.log" in the guest

message: |
  To run `singularity` inside your lima VM:
    $ limactl shell {{.Name}} singularity run library://alpine
Common setup
Saving the above contents (either QEMU or Rosetta) into a file named config.yml or using your own configuration,
create a new Lima virtual machine:
# Create a VM named cs_sdk
$ limactl start ./config.yml --name cs_sdk
Now, untar the Cerebras SDK tarball at any location under your Mac’s home directory.
We can now start a shell inside the VM, add the SDK to the PATH, and run:
# Start shell inside VM
$ limactl shell cs_sdk

# Add absolute path under Mac home directory containing SDK to PATH
# This MUST be absolute path; homedir on VM and Mac are not the same
$ export PATH=/User/path/to/sdk:$PATH
From this point, you can run the SDK examples within the VM.
Lima VMs automatically port forward, so if you launch the SDK GUI within the VM,
you can view it in your Mac’s browser at 127.0.0.1:8000/sdk-gui.
Using Additional Python Packages
The provided cs_python script runs the host code from the Python environment
located within the container.
Occasionally, you may want to add additional external packages to this Python environment.
To do this, save the following script as sdk_install_python_package.sh:
#!/bin/bash

py_path=$(realpath $1)
package_name=$2
SINGULARITYENV_PYTHONPATH="$(realpath $py_path)"
cs_python -c "
import subprocess
import sys
package='$2'
subprocess.check_call([sys.executable, '-m', 'pip', 'install', '--target=$py_path', package])
"
echo -e "Please do\nexport SINGULARITYENV_PYTHONPATH=\"$SINGULARITYENV_PYTHONPATH\"\nbefore using cs_python"
Use this script from your local application workdir to install a Python package via pip
in a local directory MY_LOCAL_PY_PATH:
mkdir MY_LOCAL_PY_PATH
bash /PATH/TO/sdk_install_python_package.sh ./MY_LOCAL_PY_PATH MY_PIP_PACKAGE_NAME
Then, before running cs_python, set SINGULARITYENV_PYTHONPATH with your installed package’s
location:
export SINGULARITYENV_PYTHONPATH=$(realpath $MY_LOCAL_PY_PATH)